H G Tut H C DT A F FB E P E Image Map
Showing posts with label Mixed Media. Show all posts

Monday, October 23, 2017

Mixed Media Celebrate Cards for Wild Orchid Crafts

Happy Monday!! It's my turn to post on the Wild Orchid Crafts blog and I have a couple of mixed media cards to share with you today featuring flowers made with flower-making foam.


I colored the Foamiran with oil pastels and added small ivory double headed pearl stamens in the centers. The papers are from 49 and Market.


I also used Cottage Roses, Lilies, Hip Rosebuds, White Mulberry Paper Leaves, Skeleton Leaves, Pearl Sprays, Self-Adhesive Pearls and Lace.


Some close-ups:


 Wild Orchid Products Used:


Thanks so much for stopping by!!
Have a great day :)

Saturday, November 5, 2016

Anything But Cute Challenge #19 - Rustic Glam

Happy Saturday!! I hope you have fun plans for the weekend!! It's time for a new challenge at Anything But Cute!! The theme this week is an awesome one...Rustic Glam :)


The fabulous and amazing Niki of Pawsitively Creative is the hostess for this challenge!! Here's what she had to say about the theme:


Create a mixed media design featuring rustic elements such as whitewashed wood, chicken wire, burlap, soft subtle tones and neutrals. Don't forget to add the GLAM part with some sparkle and BLING!


For my Rustic Glam project, I upcycled an old bamboo light. This is what it looked like before.


I disassembled it and then coated the surface with super heavy gesso.


Once the gesso dried, I covered it with DecoArt Weathered Wood Crackle Medium. Once that dried and the cracks appeared, I applied DecoArt Antiquing Medium in Antique Gray to the cracks and then wiped most of it off with a wet wipe.


Here's where my project went off course. I'd planned on using real chicken wire and then adhering crystals to the holes. So, I went to Menards and Rural King and Tractor Supply, hoping to purchase a small roll. The smallest roll I could purchase was 50 yards!! I really had no use for 49 extra yards of chicken wire. So I was wandering the aisles of Joann and I came across these rolls of mesh. The one on the left is actually a chicken wire pattern with bits of glitter...glam bonus!! I loved the look of the one on the right, too so I purchased both :)


I used the chicken wire mesh on two sides and this one on the other two. To add a bit more bling, I strung crystals and added them to the panels.


Here's another look at the chicken wire mesh. You can see the bits of glitter.


It's kinda like Rustic Glam meets Shabby Chic!! Now it's your turn!! Head on over to Anything But Cute to see the AMAZING projects my very talented design team sisters have created for today's challenge!! Then link up your Rustic Glam mixed media project! I can't wait to see what you create :)

Wednesday, October 5, 2016

Anything But Cute - Inspired By An Autumn Day

This is my 2nd post...for the Scrapy Land Challenge, click HERE.

{Scheduled Post} Happy Wednesday!! It's time for a new challenge at Anything But Cute!! The theme this month is An Autumn Day.


The sweet and amazing Autumn from sewpaperpaint is our fabulous hostess this month and what a fitting theme she's chosen :) Here's what she had to say about the theme:


I could not help but chose October as my month to hostess here at Anything But Cute. This month, we want to see your creations inspired by An Autumn Day. Anything goes mixed media with an fall color palette, or Autumnal elements. Be inspired by nature with the sights, smells, and sounds of this beautiful season. We cannot wait to see the amazing artwork you turn out!


For my card inspired by an Autumn day, I started out with watercolor paper and my Dylusions sprays.


I just started spraying, with the lightest colors first. Lemon Zest...


Pure Sunshine and Squeezed Orange...


Some Postbox Red. I just kept spraying until I had a mixture I was happy with. I don't have pictures of the rest of the process. I wasn't really sure where I was going with this at the time :)


I added texture paste through a The Crafter's Workshop Believe Script stencil. The birds in the top left corner are a Tim Holtz Remnant Rub.


The tree is a Frantic Stamper Medium Bare Ash die, cut in black sticky-back foam.


The leaves were all cut from the sprayed papers with Cheery Lynn Fall Leaves dies. I love the texture the swirls give to the leaves. Memory Box Grove Branches were added among the leaves, as was a Leane Creatief Pine Cone die.


The frame was made with a silicone die, air dry clay and crackle paint. Once it dried and cracked, DecoArt Raw Umber Antiquing Cream was rubbed into the cracks. The stamp is a Stampin Up stamp and you can't tell in the pic, but crackle glaze was added. Grateful is a My Creative Time die and the beautiful crinkle ribbon is from DL.ART.


I added some sisal for fall texture and inked all of the edges with Gathered Twigs Distress Ink.


Now it's your turn!! Head on over to Anything But Cute to see the amazing projects created by my talented design team sisters. Then link up your project inspired by an Autumn day. I can't wait to see what you create :)

Friday, August 5, 2016

Anything But Cute August Challenge - Shabby Garden

Happy Friday!! I hope you have fun plans for the weekend!! I will be glued to the television watching the Olympics :) I am so excited to be the hostess for this month's challenge at Anything But Cute!! I hope you will join in!!


For the theme of this challenge, I chose Shabby Garden, using the following Mood Board:


For this challenge, we are asking you to take a stroll through a romantic shabby garden. Create any mixed media project strongly inspired by the mood board. Think flowers and plants in cracked pots, peeling paint bird feeders, distressed timeworn furniture, crumbling statues, soft pastels and feminine accessories. Don't forget to tell us how the mood board inspired your project and have fun!!


I was inspired to create a mixed media birdhouse dripping a carpet of flowers and vines.


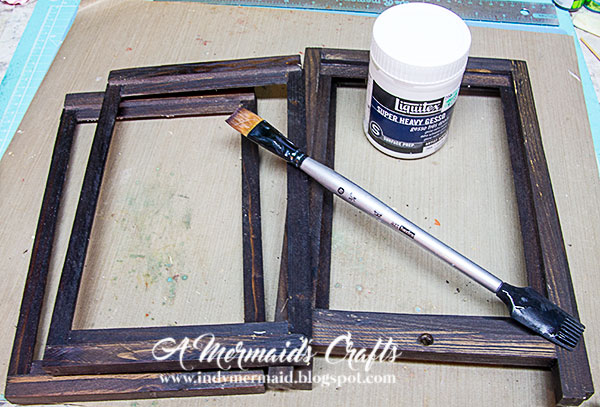
I purchased this wood birdhouse at Hobby Lobby (with a 40% off coupon ;) I painted it with Raw Sienna acrylic paint.


Next was Andy Skinner's Mega Crackle Technique. I'm so in love with this technique!! The crackle is amazing :)


To add a bit more texture, I created stencils with an Elizabeth Crafts Design brick die, and then cut them to fit the front of the birdhouse. I covered the bricks with DecoArt Crackle Paste.


For the roof, I used DCWV's Corrugated Paper and cut the edge with a Spellbinders  edge die.


I wanted my birdhouse to have a carpet of flowers and wasn't sure how to do it. I decided to try a length of cheesecloth and then started hot-gluing flowers in a random pattern.


I used several different leaf and stem dies to add greenery to the blooms and fill in any gaps between the flowers.


I mixed Lettuce Adirondack Ink with water in a Mini Mister and spritzed the leaves, patting them dry for a soft green hue.


To add a bit of color to the birdhouse, I added drops of Spun Sugar Distress Ink with water in another Mini Mister and spritzed the bricks to highlight the cracks on the bricks.


I grabbed my Prima Moulds and used air dry clay. I wasn't sure which one I wanted to use at this point, so I made a few different ones.


Once the clay dried, I rubbed DecoArt Burnt Umber Antiquing Cream over the pieces and then wiped it off, leaving the cream in the nooks and crannies for a weathered look.


I decided on the angel above the opening, welcoming the birds home :)


My house needed a bird, so I found this wood one at Hobby Lobby (yep, another 40% off coupon ;)


I spritzed it with DecoArt Violet Shimmer Mist, covered it with Nuveo Embellishment Mousse (from Sparkle N Sprinkle) and then covered it in crackle glaze. Once it cracked and dried, I used DecoArt Antiquing Cream in Titanium White to highlight the cracks.


I had to attach a wood peg for my bird to perch on. You can also see the cracks in the bricks in this pic.


One side of the roof had flowers so the other needed something. I painted Tim Holtz Butterfly dies pink and used the Mega Crackle technique. The bottom butterfly layer was stamped with a crakle stamp.


I added pearl strands from Wild Orchid Crafts and some glittered butterflies to the flowers.


To finish the edge of the roof, I added strips of lace.


For the porch, I used more corrugated cardboard paper cut with an Impression Obsession Beach Fence. On the corners, I used Frantic Stamper Garden Birdhouse dies for the climbing vines.


I'm entering my birdhouse in the following challenges:

1) Simon Says Stamp Wednesday Challenge - Fabulous Florals
2) Altered Eclectics - Anything Goes Mixed Media
3) Love to Create Challenge - Anything Creative /Mixed Media
4) Rhedd's Creative Spirit - August Challenge
5) Things to Alter - Anything Goes
6) Decorate to Celebrate - Anything Goes
7) Love to Scrap - Take Two
8) Emerald Creek Dares - Get Outside and Play (birdwatching is a sport, right ??!! ;)


Now it's your turn!! Head on over to Anything But Cute to see the amazing projects my design team sisters have created for today's challenge!! I guarantee you'll be blown away!! Then I sincerely hope you will link up your Shabby Garden mixed media project!! I can't wait to see what you create :)

LinkWithin

Related Posts Plugin for WordPress, Blogger...