H G Tut H C DT A F FB E P E Image Map
Showing posts with label Tutorial. Show all posts

Friday, October 27, 2017

Shabby Chic Card Tutorial for Lemoncraft

Hello, everyone!! It's my turn to post on the Lemoncraft Blog and I have a tutorial to share with you on how I make shabby chic cards featuring several Lemoncraft products from the House of Roses collection.


These are the cards I will be making today :)


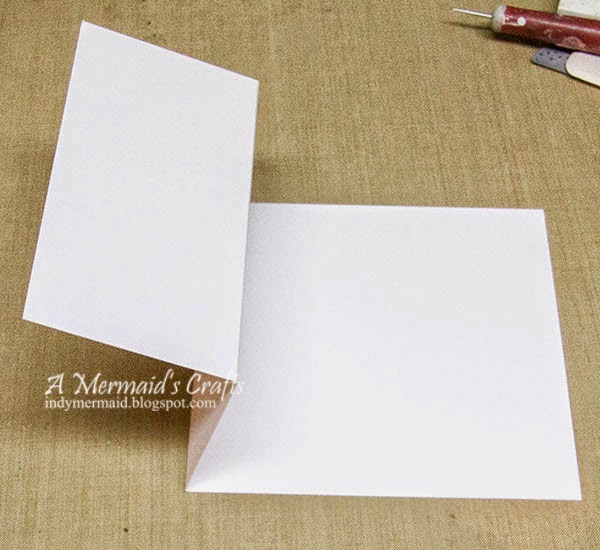
For the base of the cards, I used heavyweight (110 lb) cardstock, cut 5 1/2 x 5 1/2. The next layer of paper is from the House of Roses Basic Stack, measuring 5 1/4 x 5 1/4. I distressed the edges of both layers, as shown on the left, using a Zutter Distress-it-All, but you could use any distressing tool.


After selecting the images I wanted to use from the Vintage Time 005 Sheet, I cut an oval window in the top layer of paper (5 x 5) from the House of Roses 12x12 Collection.


Next, I cut frames for the windows using nesting oval dies. The smaller oval die is the one I used to cut the window.


I wanted the frame to have some dimension, so I added foam tape to the back before I adhered it to the paper.


I also added foam tape to the top layer of paper for added dimension.


Next, I selected an assortment of embellishments to add to the cards including Wild Orchid Crafts flowers, ribbon and leaves die cut from papers from the House of Roses Basic Stack.


I cut butterflies from the Vintage Time 008 Sheet and then colored them with a clear Wink of Stella pen for some shimmer. I added foam tape to the back of the butterflies, too.


Next, I start adding the embellishments.


For the sentiments, I chose a sheet of paper from the House of Roses Ephemera Cards and cut a banner. I then cut a banner in vellum, stamped the image with Versamark and heat embossed it with white embossing powder. I then layered the vellum over the paper.


Once the sentiment was adhered, I added some Cream Cotton Lace beneath the banners.  The clock is from the Vintage Time 009 Sheet.


For a little additional texture, I added some Tu-Tu Pink Prills.


I added a touch of water to white acrylic paint and splattered it on the cards.


For the final touch, I added some pearls.


And here is the finished card :)


And the second card:


I am entering these in the following challenges:

1) Simon Says Stamp Wednesday Challenge - Anything Goes
2) Word Art Wednesday - Anything Goes
3) Jo's Scrap Shack Funday Friday - Anything Goes


I hope you've enjoyed the tutorial!! Thanks so much for stopping by!!
Have a great day!!


https://lemoncraft.pl/shop/en/house-of-roses-collection/4959-set-of-scrapbooking-papers-house-of-roses.html
https://lemoncraft.pl/shop/en/house-of-roses-collection/4957-stack-of-basic-scrapbooking-papers-house-of-roses.html
https://lemoncraft.pl/shop/en/house-of-roses-collection/4960-house-of-roses-ephemera-cards.html
https://lemoncraft.pl/shop/en/heart-painted/4541-one-sided-scrapbooking-paper-vintage-time-005.html
https://lemoncraft.pl/shop/en/vintage-time-line/4955-one-sided-scrapbooking-paper-vintage-time-008.html
https://lemoncraft.pl/shop/en/vintage-time-line/4956-one-sided-scrapbooking-paper-vintage-time-009.html
https://lemoncraft.pl/shop/en/lace/1415-cotton-lace-cream-1-meter.html

Sunday, April 12, 2015

Bow Maker Tutorial

Happy Sunday!! I hope you are having a wonderful weekend :) I have a quick tutorial to share with you today on how I make bows for my projects. I've meant to put this together for years. I'm sure there are many ways to make bows with a bow maker, this is just how I do it. If you are like me, you don't have much time to watch videos, so I made this a short one...a little less than two minutes. Also, if you are interested, I do sell bow makers in my Etsy Store.


I put together a couple of cards for the tutorial to display the bows.


I love this couple stamp from Crafty Individuals. I cut them out and popped them up with foam tape. The papers are from KaiserCraft's Kaleidoscope stack. Love is a Die-Versions Compliments Everyday die. The flowers are from Wild Orchid Crafts, with Chloe Stems from Memory Box tucked around the edges. Her dress is covered with a Wink of Stella clear glitter pen.


I am entering this in the following challenges:
  1. DLArt - April Linky
  2. Little Scrap Pieces - Show it Off Saturday
Thanks so much for stopping by!! Have a wonderful week :)

Saturday, March 28, 2015

Jo's Scrap Shack Guest Designer

Hi everyone and happy Saturday!! I am taking over my sweet friend Jo's blog today!! I was so honored when she asked me to guest design and couldn't wait to create a project to share with you. I'd love for you to hop on over to Jo's Scrap Shack and say hi :)


Last week marked the first day of spring - yay!! So I've created a couple of easel box cards to celebrate the new season :) There are tons of tutorials on how to make these, but I just kind of winged it and created my own. I took a few pictures and threw together a quick tutorial. I wanted my card to be 5x5 and the depth of the box at 1", so using those measurements, you will need:

Box Base
  • 1 - 5 x 11 cardstock
  • 1 - 5 x 5 cardstock
  • 1 - 7 x 7 cardstock
  • 2 - 1 x 6 strips of patterned paper
  • 2 - 1 x 5 strips of patterned paper
  • 1 - 5 x 5 piece of patterned paper for inside of box (may have to trim slightly)

1) Start by scoring the 5 x 11 cardstock at 1 7/8", 3", 8" and 9 1/8". I added an eighth of an inch to each side so that the box would slide easily. Also, the reason I used 8 1/2 x 11 cardstock is because I have it in heavyweight...I don't have any 12 x 12 that I thought would be heavy enough to use as the base. I used Neenah Solar White Cardstock in 110lb. weight.


2) Fold at the score lines. It will look like the picture above. Apply glue and adhere the 5 x 5 piece of cardstock to the base.


3) It will look like this when you are done. This will be the sleeve for the box.


4) Score the 7 x  cardstock at 1" on all four sides.


5) Fold the score lines. Cut the lines pictured above. I always make the cuts a slight triangle so that the sides match up better when glued together.


6) Fold the end pieces up and adhere glue.


7) Glue the end pieces so that it forms a box.


8) The box will now slide easily into the sleeve.


9) To decorate the inside box, I used two pieces of 1 x 6 patterned paper and 2 of 1 x 5.


10) I scored the 1 x 6 pieces at 1/2" from each end and then wrapped them around each end of the box to add a little more strength to the corners of the box. I then adhered the 1 x 5 pieces on the other two sides. I did the same thing on the inside and then added the 5 x 5 patterned paper to the bottom.


Easel Card
  • 1 5 x 5 cardstock
  • 1 5 x 10 cardstock
  • Embellishments


1) Score the 5 x 10 cardstock at 2 1/2" and 5".


2) Fold as shown with a mountain fold at 2 1/2" and valley fold at 5".


3) Adhere the 5" end to the top of the box. On the 2 1/2" end, apply adhesive and adhere the 5 x 5 cardstock.


4) Your easel box will now look like this. Time to decorate!!


The papers for both of my boxes are from Prima. The edged were distressed with a Zutter DIA. The flowers are from Wild Orchid Crafts.


I used heavy-duty burlap for the handle, and several dies for each box.


They are now ready to fill and give as gifts!! I want to sincerely thank Jo for having me guest design today!! Thanks for stopping by and have a wonderful weekend :)

Monday, May 5, 2014

Adding a Gallery To Your Blog Tutorial

Below is the tutorial to include a four column Gallery on your blog like the one HERE.


This Gallery will have a picture of your project plus a link back to the original post. I've tried to make it as easy as possible to understand, so hopefully you won't have any problems if you add one to your blog :)

To start, you want to create a new Page. To create a Page, go to your Dashboard and from the drop-down menu, select Pages. Once the screen pops up, there should be a button on the top that says "New Page". Click on it.

Once the new Page opens, click on "Html".


This is the code you need for the four-column gallery:


<table cellpadding="3">
<tbody>
<tr>

<td align="center" width="25%"><a href="http://yourprojectposturl.com/" target="_blank"> <img src="http://yourimageurl.jpg" width="140" /><br />Project Name</a></td>

<td align="center" width="25%"><a href="http://yourprojectposturl.com/" target="_blank"> <img src="http://yourimageurl.jpg" width="140" /><br />Project Name</a></td>

<td align="center" width="25%"><a href="http://yourprojectposturl.com/" target="_blank"> <img src="http://yourimageurl.jpg" width="140" /><br />Project Name</a></td>

<td align="center" width="25%"><a href="http://yourprojectposturl.com/" target="_blank"> <img src="http://yourimageurl.jpg" width="140" /><br />Project Name</a></td>

</tr>
</tbody></table>

You can add as many rows as you like, just copy the code between the <tr> and the </tr> for another row. So if you wanted three rows, the code would look like this:

<table cellpadding="3">
<tbody>
<tr>

<td align="center" width="25%"><a href="http://yourprojectposturl.com/" target="_blank"> <img src="http://yourimageurl.jpg" width="140" /><br />Project Name</a></td>

<td align="center" width="25%"><a href="http://yourprojectposturl.com/" target="_blank"> <img src="http://yourimageurl.jpg" width="140" /><br />Project Name</a></td>

<td align="center" width="25%"><a href="http://yourprojectposturl.com/" target="_blank"> <img src="http://yourimageurl.jpg" width="140" /><br />Project Name</a></td>

<td align="center" width="25%"><a href="http://yourprojectposturl.com/" target="_blank"> <img src="http://yourimageurl.jpg" width="140" /><br />Project Name</a></td>

</tr>
</tbody></table>

The areas in bold are where you are going to add your own code.

1. For http://yourprojectposturl.com/" you paste in the url address of your blog post.

- Open the original blog post
- In the address bar, copy the URL:


- Paste in the copied URL into the highlighted area of the code:

<td align="center" width="25%"><a href="http://yourprojectposturl.com/" target="_blank"> <img src="http://yourimageurl.jpg" width="140" /><br />Project Name</a></td>

- So it should look like this now:

<td align="center" width="25%"><a href="http://indymermaid.blogspot.com/2014/03/remembering-these-special-moments.html" target="_blank"> <img src="http://yourimageurl.jpg" width="140" /><br />Project Name</a></td>

2. For the "http://yourimageurl.jpg" you are going to add the location of the picture you want to post in the gallery. My example is for those of you using Picasa Web Albums, which if you using Blogger probably are using Picasa.

1. Click on this link to open Picasa: https://picasaweb.google.com/lh/myphotos
2. Log in if needed. Your Picasa albums should all be displayed. You may have several different ones. I have five albums that have the pictures from my blog posts and then several others for dt blogs I've been on, and some random pictures. You will need to find the album that has the picture you are looking for. The Album should have have your blog name and then beneath there will be a number of photos. This is what my most recent album looks like:


Most of the photos in the album will be in chronological order, so it's pretty easy to find the pictures you are looking for. The newest photos will be at the very bottom. If you don't see the photo you are looking for, check the other albums.

Find the picture you want to include in the gallery. Right click and a pop-up box will appear:


Click on "Copy Image Location". Then you will paste the copied URL into the highlighted area of the code:

<td align="center" width="25%"><a href="http://indymermaid.blogspot.com/2014/03/remembering-these-special-moments.html" target="_blank"> <img src="http://yourimageurl.jpg" width="140" /><br />Project Name</a></td> 

It should look like this now:

<td align="center" width="25%"><a href="http://indymermaid.blogspot.com/2014/03/remembering-these-special-moments.html" target="_blank"> <img src="https://blogger.googleusercontent.com/img/b/R29vZ2xl/AVvXsEhLZcuzloz_MvOU8bc7WHjofV2cfpvZHuTCHA3prlgxRF5l2OfW4g6Ve7Uyz6bxNZkIZsVHA42Kf5Jdyur-kEAUphzjxLYgjqrC4B3sjSv3uPwIdYA2-o7-2z9QQKcc2l-DCTa6qSDIYcpr/w121-h209-p-no/" width="140" /><br />Project Name</a></td>

3. Next is the Project Name. That's the easiest one. You just type in whatever you want it to say below the picture. I kept mine to one line, but you can add as much of a description as needed.

<td align="center" width="25%"><a href="http://indymermaid.blogspot.com/2014/03/remembering-these-special-moments.html" target="_blank"> <img src="https://blogger.googleusercontent.com/img/b/R29vZ2xl/AVvXsEhLZcuzloz_MvOU8bc7WHjofV2cfpvZHuTCHA3prlgxRF5l2OfW4g6Ve7Uyz6bxNZkIZsVHA42Kf5Jdyur-kEAUphzjxLYgjqrC4B3sjSv3uPwIdYA2-o7-2z9QQKcc2l-DCTa6qSDIYcpr/w121-h209-p-no/" width="140" /><br />Project Name</a></td>

It should look like this now:

<td align="center" width="25%"><a href="http://indymermaid.blogspot.com/2014/03/remembering-these-special-moments.html" target="_blank"> <img src="https://blogger.googleusercontent.com/img/b/R29vZ2xl/AVvXsEhLZcuzloz_MvOU8bc7WHjofV2cfpvZHuTCHA3prlgxRF5l2OfW4g6Ve7Uyz6bxNZkIZsVHA42Kf5Jdyur-kEAUphzjxLYgjqrC4B3sjSv3uPwIdYA2-o7-2z9QQKcc2l-DCTa6qSDIYcpr/w121-h209-p-no/" width="140" /><br />Shabby Flower Tag</a></td>

You do this for each entry into the Gallery. You may need to play around with the width if the Gallery is to wide or to narrow for your page. I wanted my pictures to be more or less the same size, so if the pictures were taller, instead of keeping the width="140", I delete the width and add: height="170". So it would look like this:

<td align="center" width="25%"><a href="http://indymermaid.blogspot.com/2014/03/remembering-these-special-moments.html" target="_blank"> <img src="https://blogger.googleusercontent.com/img/b/R29vZ2xl/AVvXsEhLZcuzloz_MvOU8bc7WHjofV2cfpvZHuTCHA3prlgxRF5l2OfW4g6Ve7Uyz6bxNZkIZsVHA42Kf5Jdyur-kEAUphzjxLYgjqrC4B3sjSv3uPwIdYA2-o7-2z9QQKcc2l-DCTa6qSDIYcpr/w121-h209-p-no/" height="170" /><br />Shabby Flower Tag</a></td>

Again, you may need to play around with the picture sizes to get what you want. Also, you can see that there is an open space on the top row of my gallery. It's where I will add my next project since I'm keeping the most recent projects on the top. So to leave a blank space, you just delete one line in the code:

<tr>

<td align="center" width="25%"><a href="http://yourprojectposturl.com/" target="_blank"> <img src="http://yourimageurl.jpg" width="140" /><br />Project Name</a></td>

<td align="center" width="25%"><a href="http://yourprojectposturl.com/" target="_blank"> <img src="http://yourimageurl.jpg" width="140" /><br />Project Name</a></td>

<td align="center" width="25%"><a href="http://yourprojectposturl.com/" target="_blank"> <img src="http://yourimageurl.jpg" width="140" /><br />Project Name</a></td>

<td align="center" width="25%"><a href="http://yourprojectposturl.com/" target="_blank"> <img src="http://yourimageurl.jpg" width="140" /><br />Project Name</a></td>

</tr>

So it will look like this:

<tr>

<td align="center" width="25%"><a href="http://yourprojectposturl.com/" target="_blank"> <img src="http://yourimageurl.jpg" width="140" /><br />Project Name</a></td>

<td align="center" width="25%"><a href="http://yourprojectposturl.com/" target="_blank"> <img src="http://yourimageurl.jpg" width="140" /><br />Project Name</a></td>

<td align="center" width="25%"><a href="http://yourprojectposturl.com/" target="_blank"> <img src="http://yourimageurl.jpg" width="140" /><br />Project Name</a></td>

</tr>

When you are ready to add your next project, you just need to add the one line of code back in:

 <td align="center" width="25%"><a href="http://yourprojectposturl.com/" target="_blank"> <img src="http://yourimageurl.jpg" width="140" /><br />Project Name</a></td>

I hope this is easy to understand. If you decide to add one to your blog, please leave me a comment so I can see it!!

Thanks so much for stopping by :)

LinkWithin

Related Posts Plugin for WordPress, Blogger...